
Quillbot is an invaluable tool for many writers, offering features such as paraphrasing, grammar checking, and vocabulary enhancement. These features are especially beneficial for students, professionals, and content creators who seek to improve the quality and clarity of their writing. However, there may come a time when you no longer need the service, or perhaps you want to explore other tools. Canceling your Quillbot subscription is a straightforward process, but it's essential to follow the correct steps to ensure that you are not billed further. This guide will walk you through the process of canceling your Quillbot subscription.
Introduction to Quillbot Subscriptions
Quillbot offers a range of subscription plans, from monthly to annual options, designed to meet diverse user needs. Premium plans unlock advanced features such as:
- Enhanced Paraphrasing Modes: Includes Standard, Fluency, and Creative options for tailored writing.
- Higher Character Limits: Allows processing of larger text inputs.
- Faster Processing Times: Speeds up the workflow for time-sensitive tasks.
While these features are immensely beneficial, your requirements might evolve due to changing budgets, completed projects, or a preference for other services. Whatever the reason, canceling your subscription is a straightforward process.
Steps to Cancel Quillbot Subscription
Log into Your Quillbot Account

To begin the cancellation process, you first need to log into your QuillBot's account. Visit the Quillbot website and click on the persona icon in the top right corner. Click on log-in and enter your email address and password to access your account dashboard. If you have forgotten your password, use the "Forgot Password" link to reset it.
Related: How to Get Quillbot Premium for Free
Navigate to Account Settings

Once you are logged in, locate the profile icon or your username at the top right corner of the page. Clicking on this icon will reveal a dropdown menu. From this menu, select "Account Details" to proceed to the next step.
Access Subscription Management
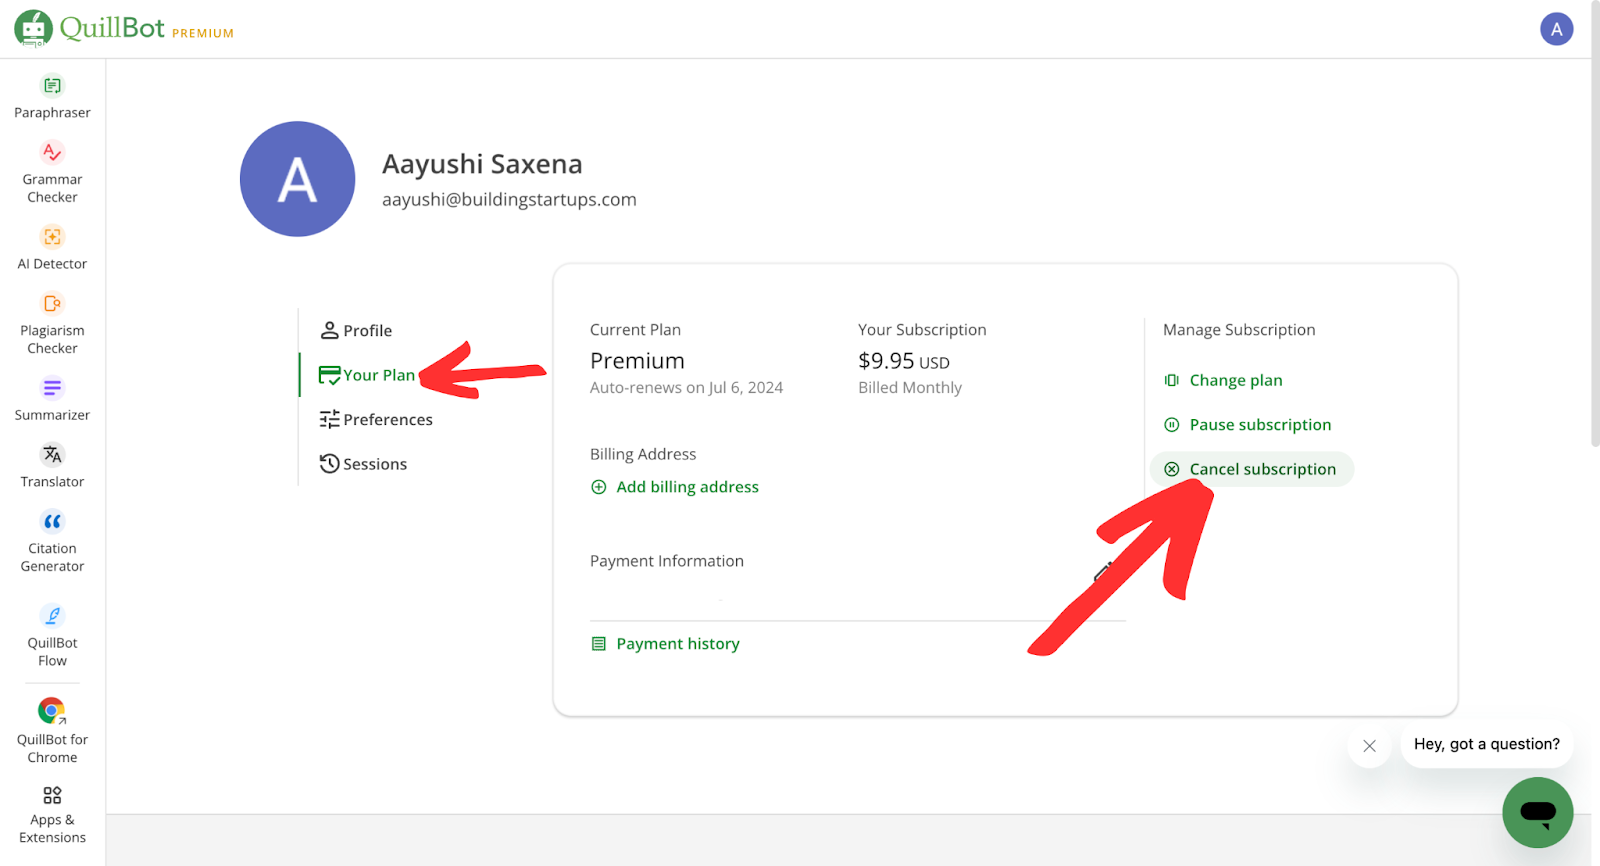
In the Account Details page, look for a section labeled "Your Plans". This section will contain details about your current subscription plan, including the renewal date and the amount you are being charged. Click on this section to access the subscription management options.
Related: How to Use AI to Write Articles
Cancel Subscription
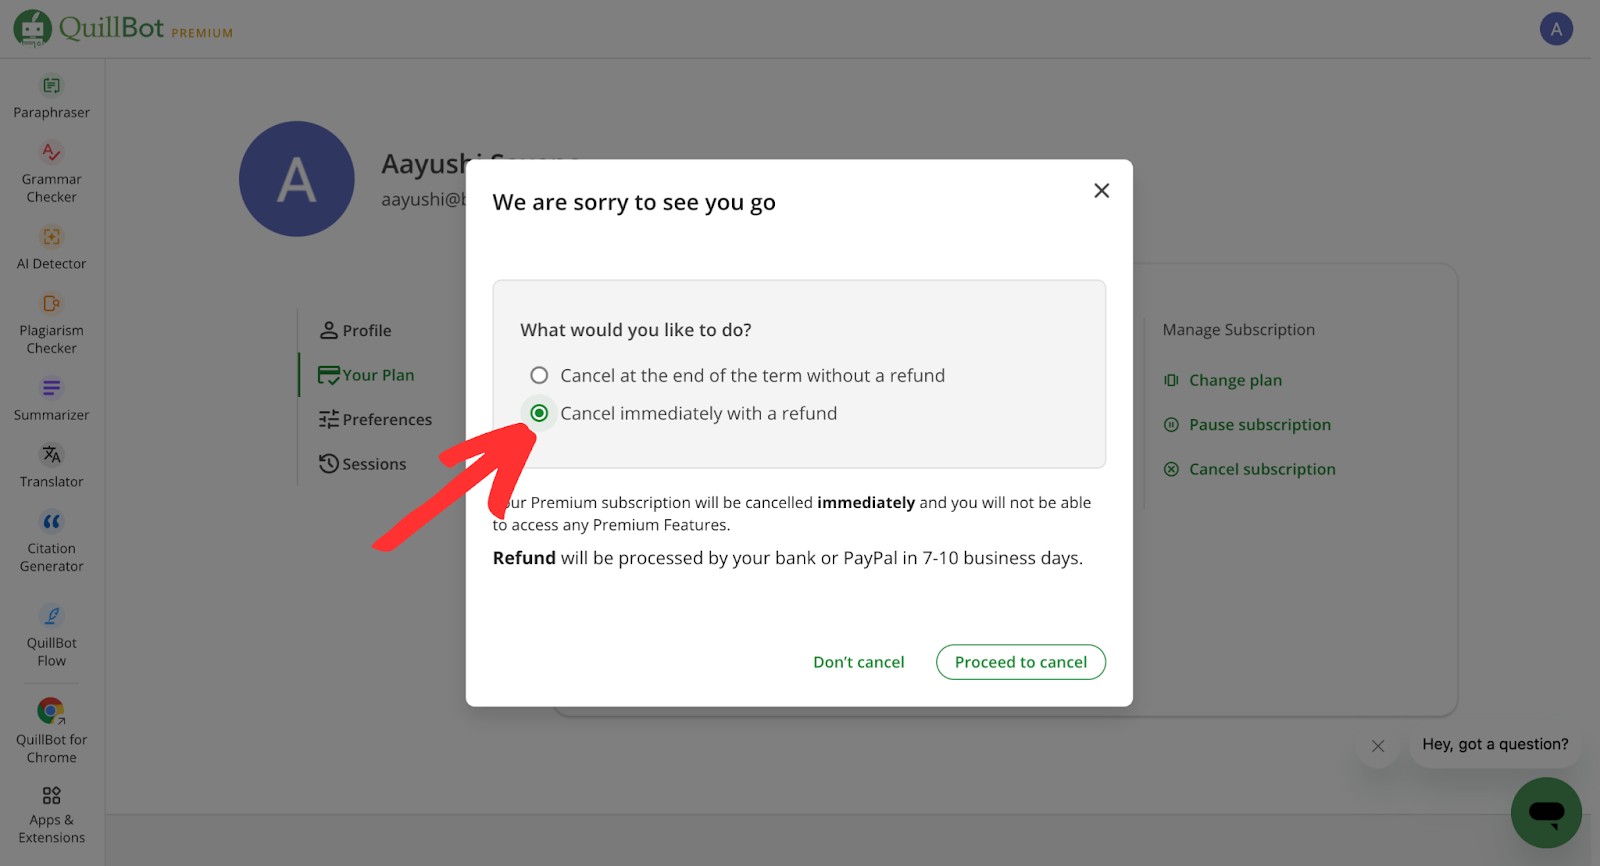
Within the Your Plans section, you will find an option to manage or cancel your subscription. This option is labeled as "Cancel Subscription". Click on this option to initiate the cancellation process. After that, click on “Cancel immediately without a refund”. Follow the on-screen prompts carefully. You may be asked to confirm your decision to cancel, and possibly to provide a reason for your cancellation.
Confirmation of Cancellation
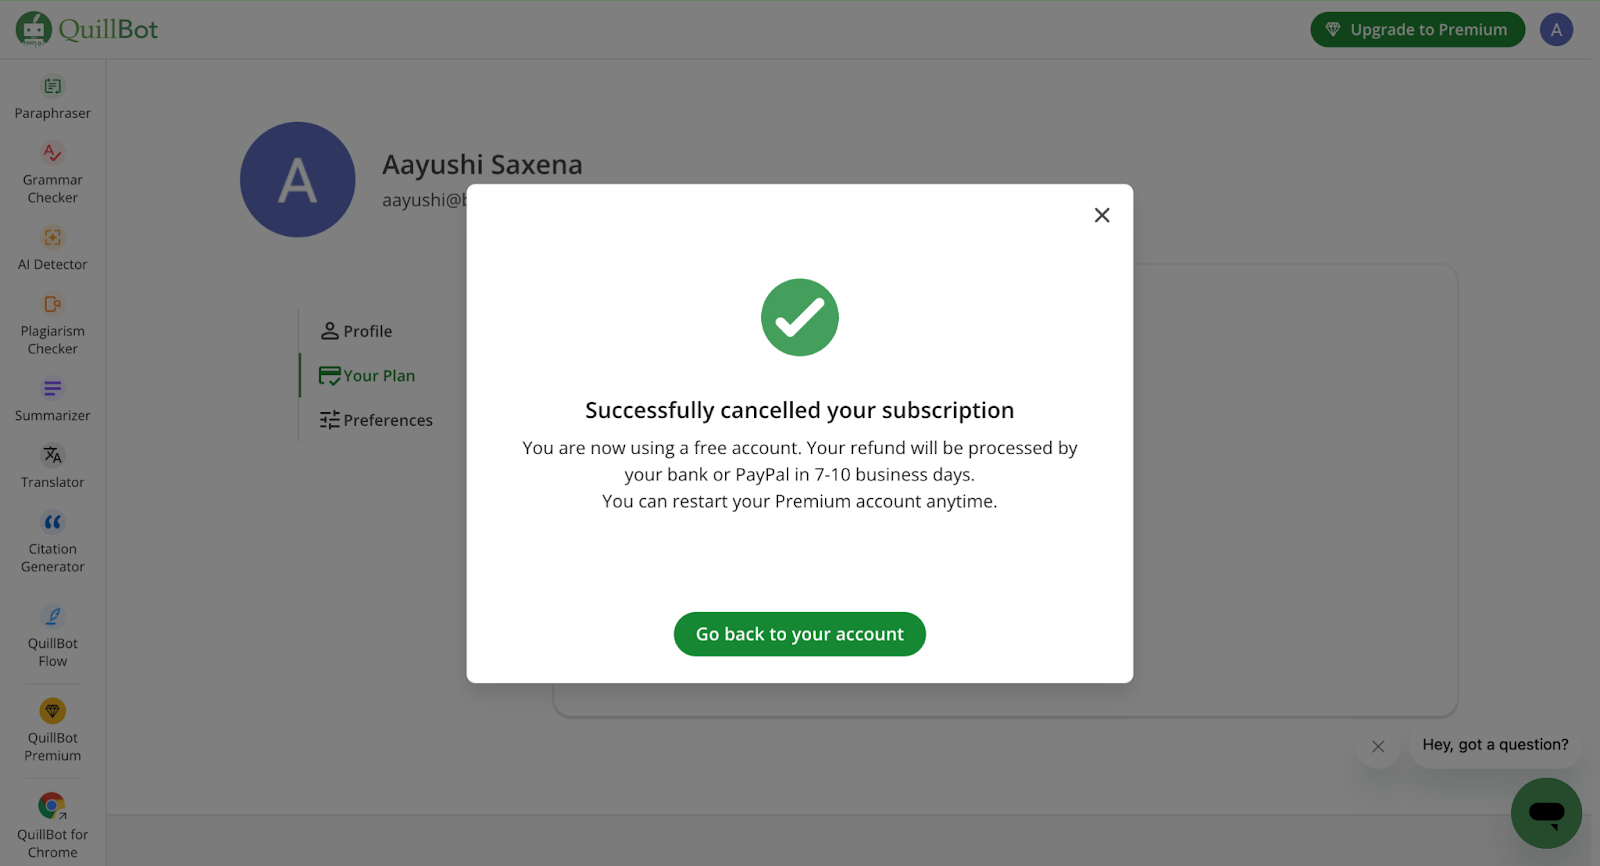
After you have confirmed your cancellation, you should receive a confirmation message or email indicating that your subscription has been successfully canceled. This confirmation serves as proof that you have canceled the service and will no longer be charged. Be sure to save this confirmation for your records.
Verify Cancellation
To ensure that your subscription has been canceled, revisit your account settings and check your subscription status. The status should indicate that you no longer have an active subscription or that your subscription will terminate at the end of the current billing period. If the status still shows as active, contact Quillbot’s customer support for further assistance.
Related: How To Use Quillbot?
Additional Considerations
Refund Policies
Quillbot’s refund policies vary depending on when you cancel:
- If you cancel mid-billing cycle, you might retain access to premium features until the cycle ends.
- Refunds for unused time may be available; consult the terms and conditions or contact customer support for clarification.
Customer Support
If you face issues during cancellation or have questions, Quillbot’s customer support team is available to assist you. They typically offer support via email, live chat, or phone.
Reactivation
Should you decide to return to Quillbot in the future, reactivation is seamless:
- Log into your account and select a new subscription plan.
- Your previous settings and preferences may still be saved, allowing you to resume effortlessly.
By following this guide, you can cancel your Quillbot subscription with ease, ensuring you avoid unnecessary charges. Always verify the cancellation status and retain confirmation emails for your records. For any complications or concerns, Quillbot’s customer support team is there to assist.
FAQ's
1. What happens to my account after I cancel my Quillbot subscription?
After canceling your subscription, your account will revert to the free plan. You will lose access to premium features such as advanced paraphrasing modes, higher character limits, and faster processing times, but you can continue using the basic features available to free users.
2. Can I cancel my Quillbot subscription at any time?
Yes, you can cancel your subscription at any time. However, depending on when you cancel, you may still have access to premium features until the end of your current billing cycle, as Quillbot typically does not offer prorated refunds.
3. Will I receive a refund if I cancel my subscription mid-cycle?
Quillbot’s refund policy does not generally include prorated refunds for unused time in a subscription period. It’s best to check their terms and conditions or contact customer support to clarify your specific situation.
4. How can I verify that my subscription has been successfully canceled?
To confirm your cancellation:
- Log into your account.
- Check the status of your subscription in the Your Plans section under Account Details.
- Look for confirmation emails or messages indicating the cancellation. If there are discrepancies, contact Quillbot’s customer support team.
5. Can I reactivate my Quillbot subscription after canceling it?
Yes, you can easily reactivate your subscription at any time. Simply log into your account, go to the subscription section, and select a new plan. Your previous account settings and preferences may still be available, ensuring a smooth reactivation process.