
Creating an invoice is a crucial task for businesses and freelancers, ensuring timely payments and maintaining professional records. Otto simplifies the invoicing process, allowing users to generate using its invoicing software and send invoices with ease. Follow this step-by-step guide to create an invoice using Otto.
Step 1: Sign Up for an Account
To get started, you need to sign up for an Otto AI account. If you already have one, simply log in using your credentials.
- Visit the Otto website.
- Click on the "Sign Up" button and enter your details.
- Verify your email and log in to your dashboard.
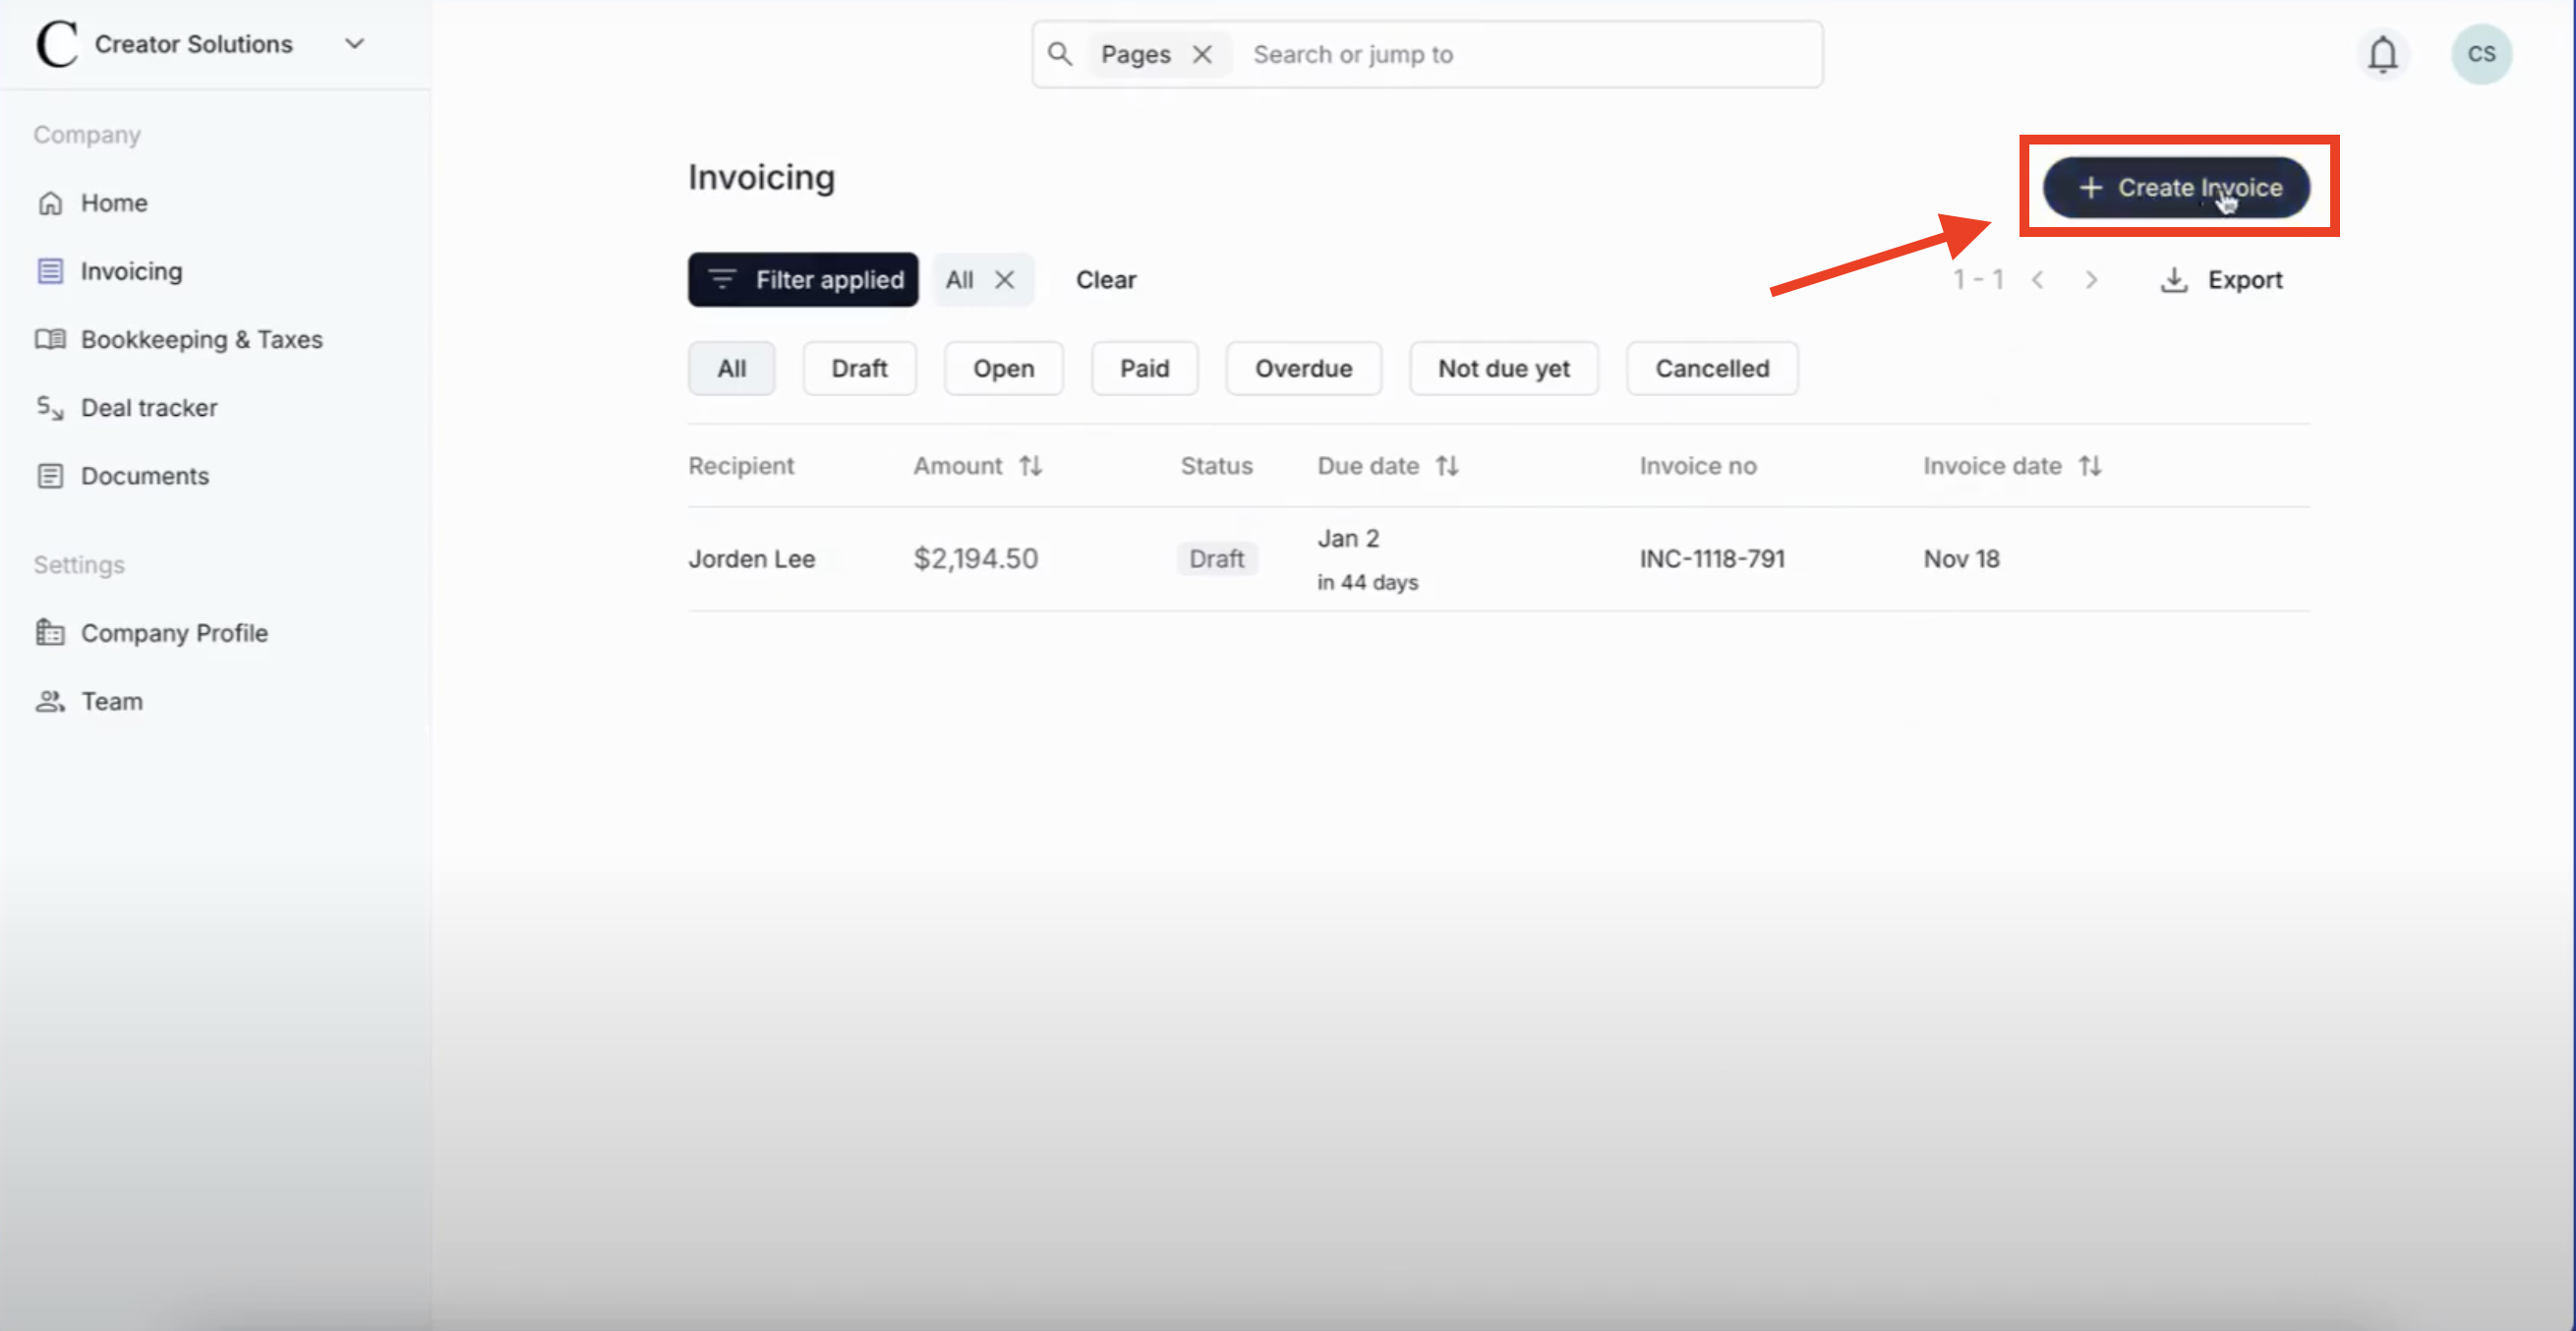
Step 2: Click on the "Create Invoice" Button
Once logged in, navigate to your dashboard and find the "Create Invoice" button on the right-hand side of the screen. Click on it to start the invoicing process.
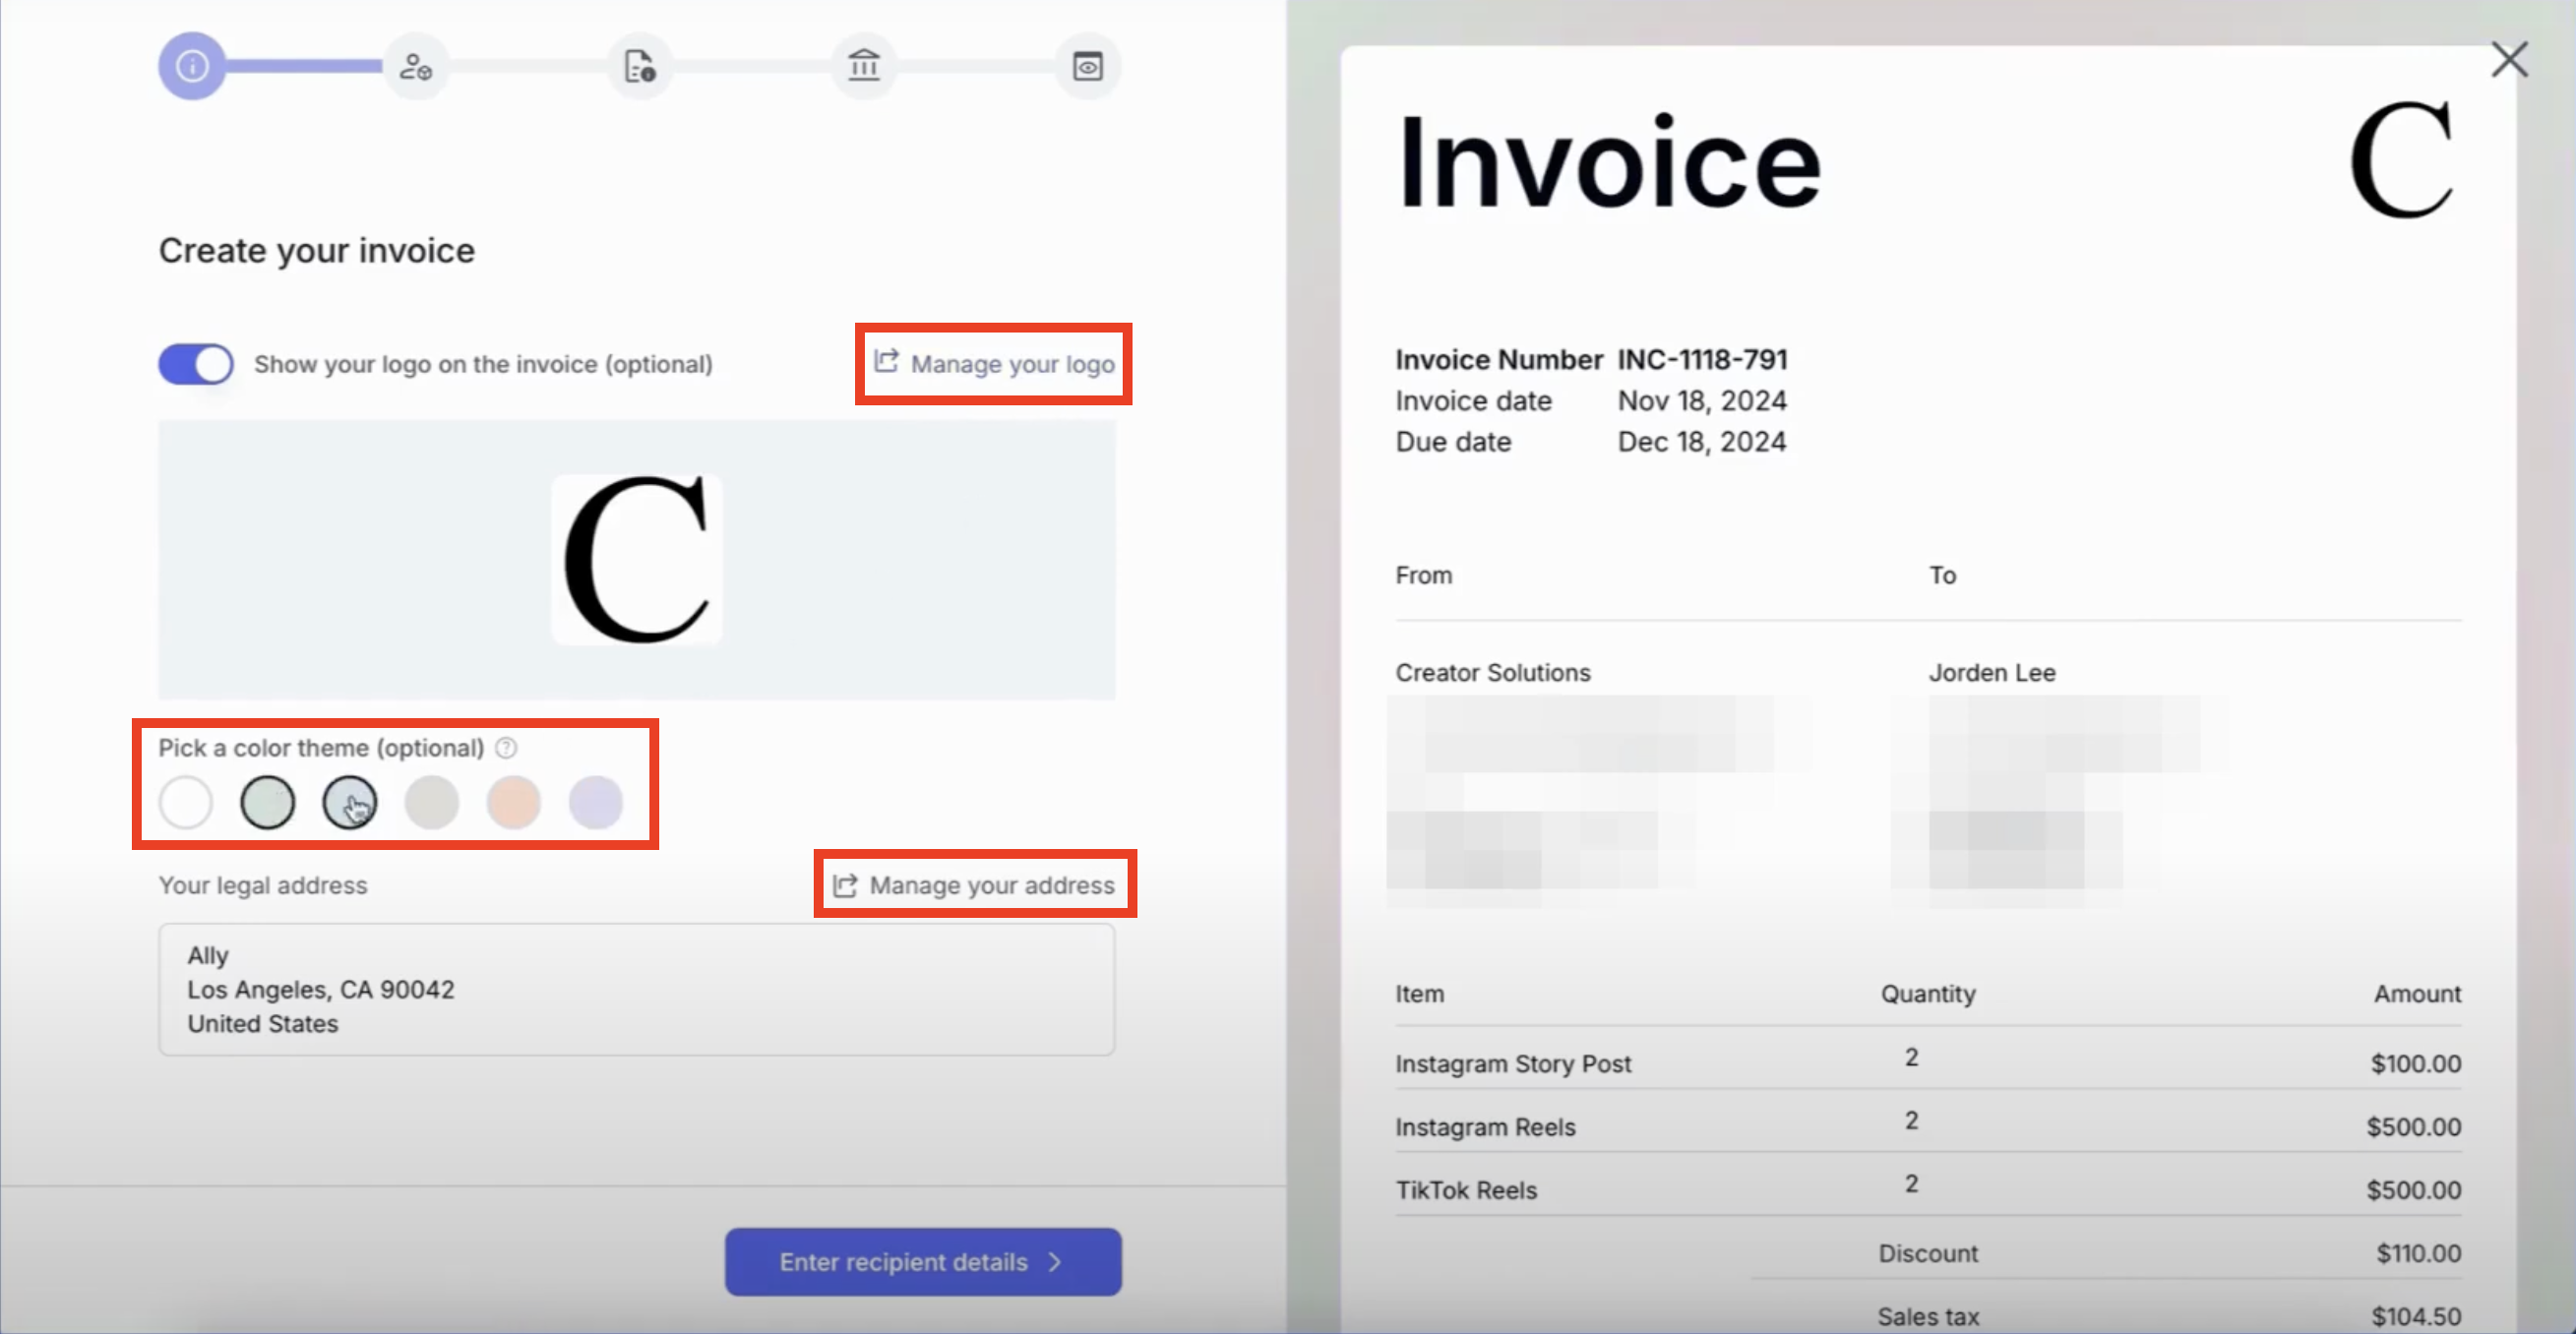
Step 3: Upload Your Company Logo and Customize the Invoice
Personalize your invoice by adding your brand elements:
- Upload your company logo.
- Select a color scheme that matches your brand identity.
- Enter your legal business address.
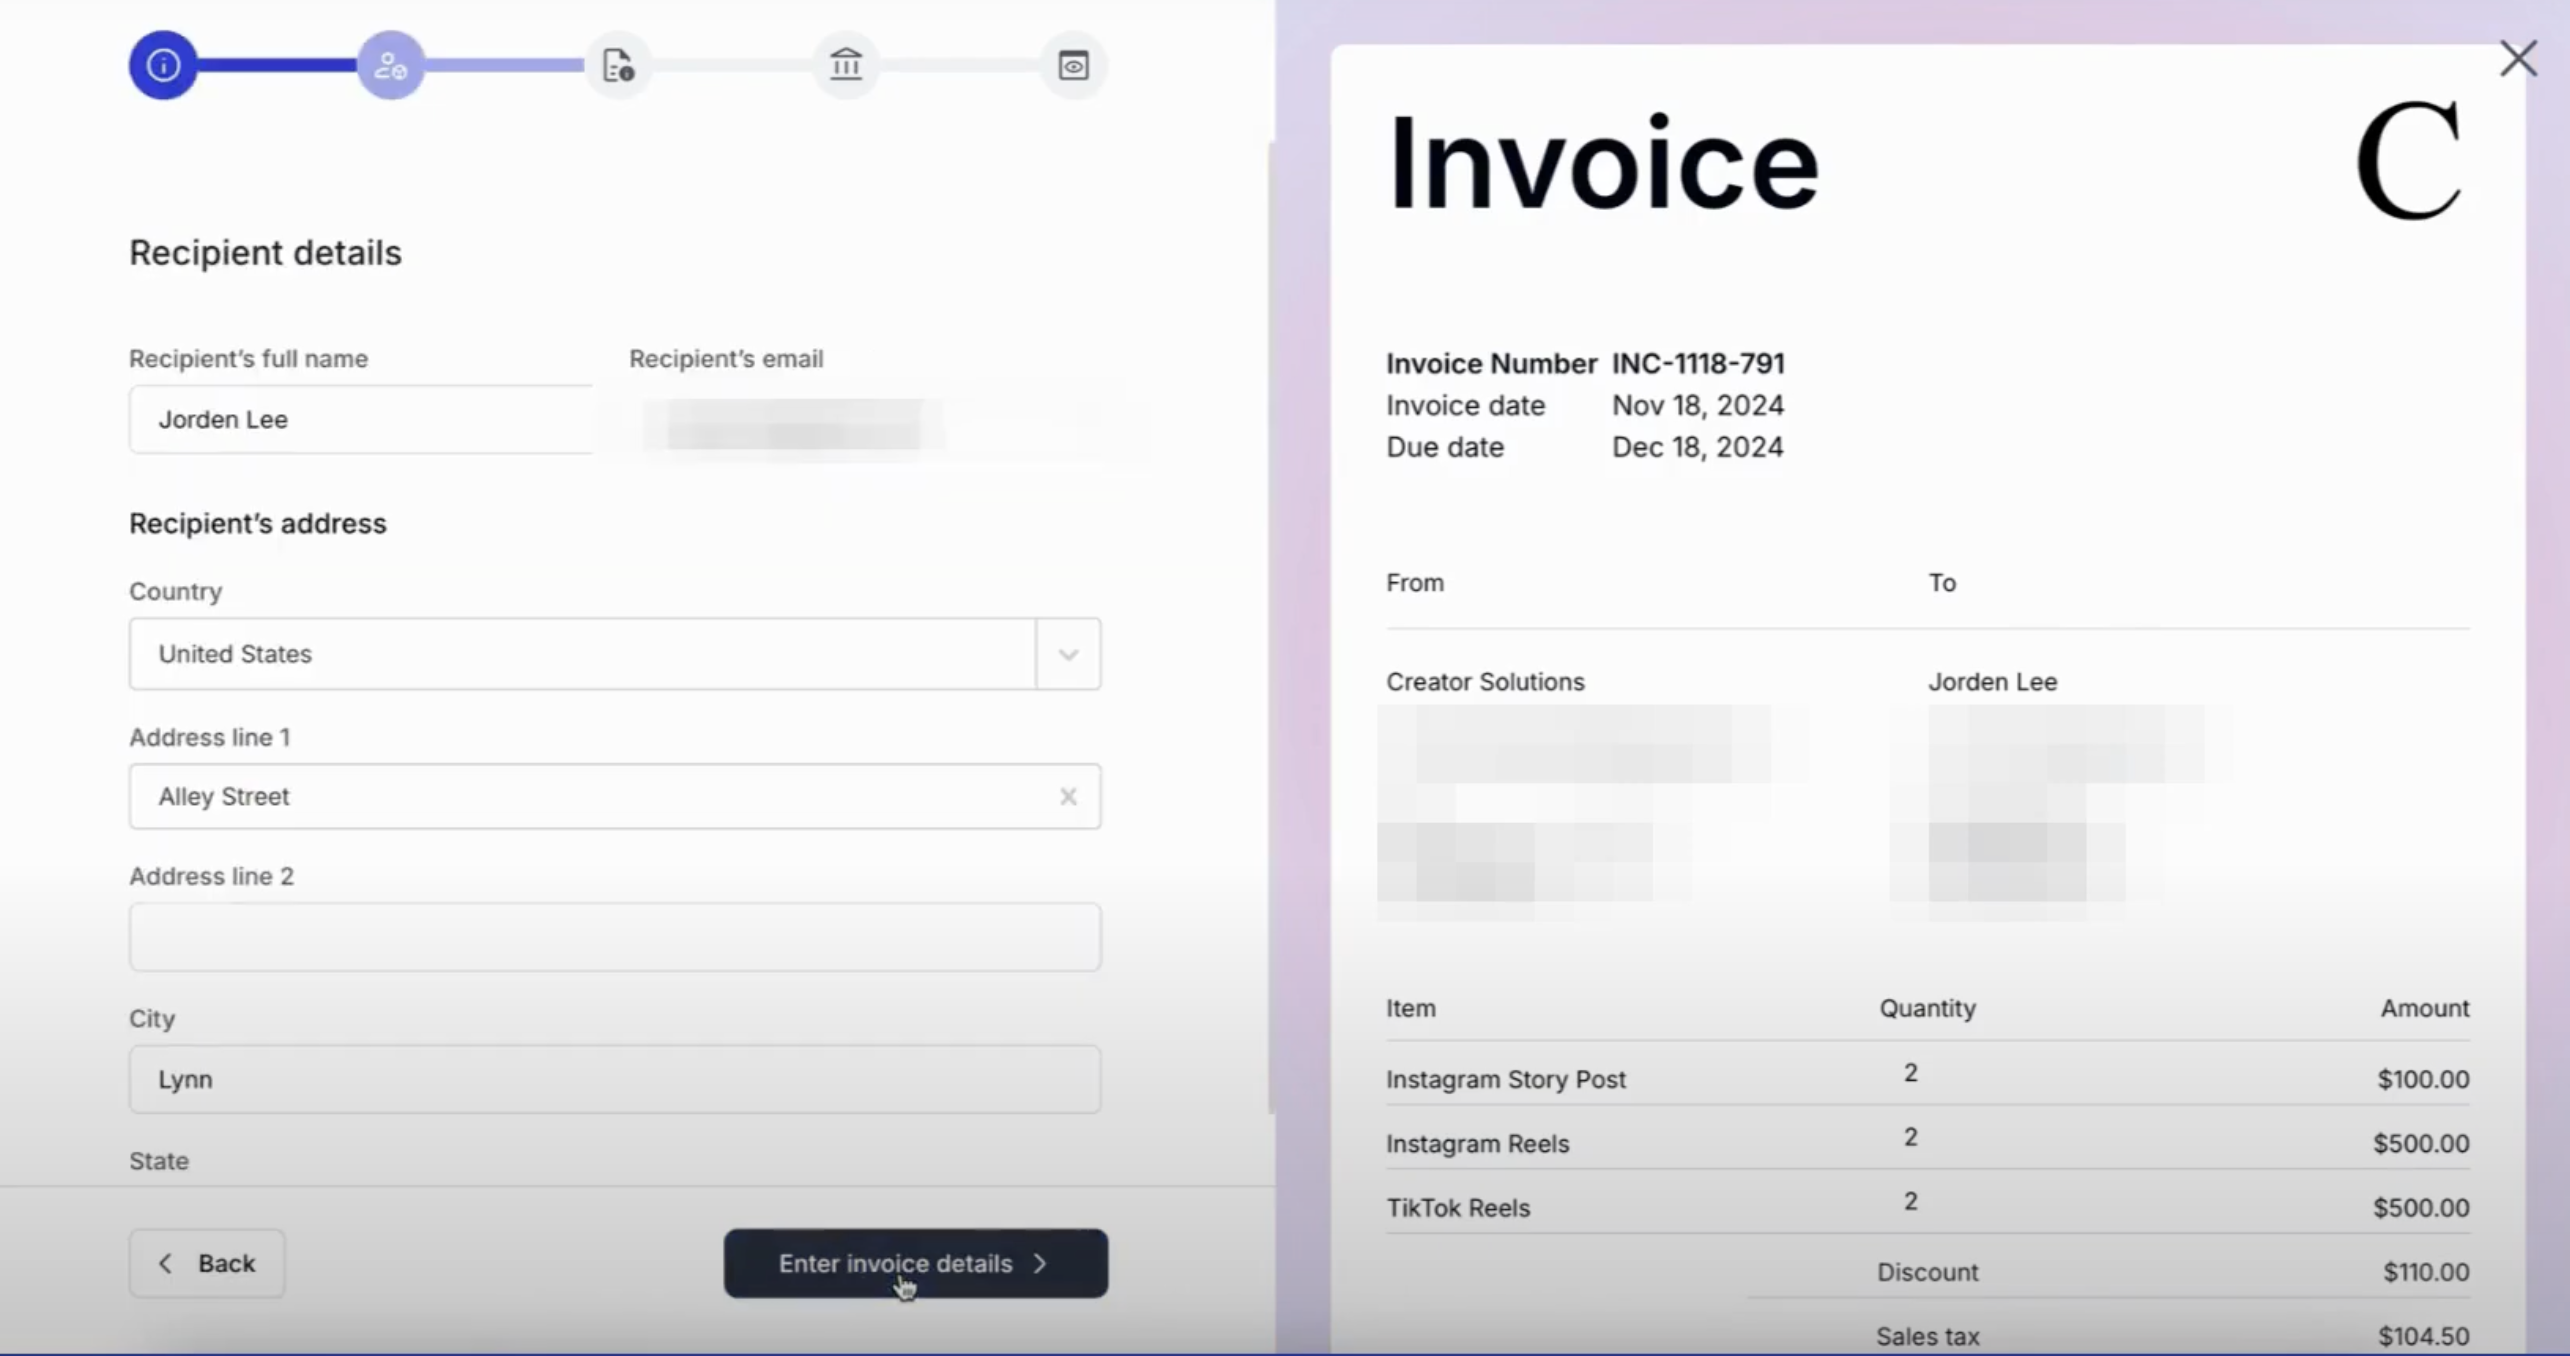
Step 4: Enter Recipient Details
Click on the "Enter Recipient Details" button and fill in the necessary information, including:
- Recipient’s name or business name
- Email address
- Billing address
- Contact information
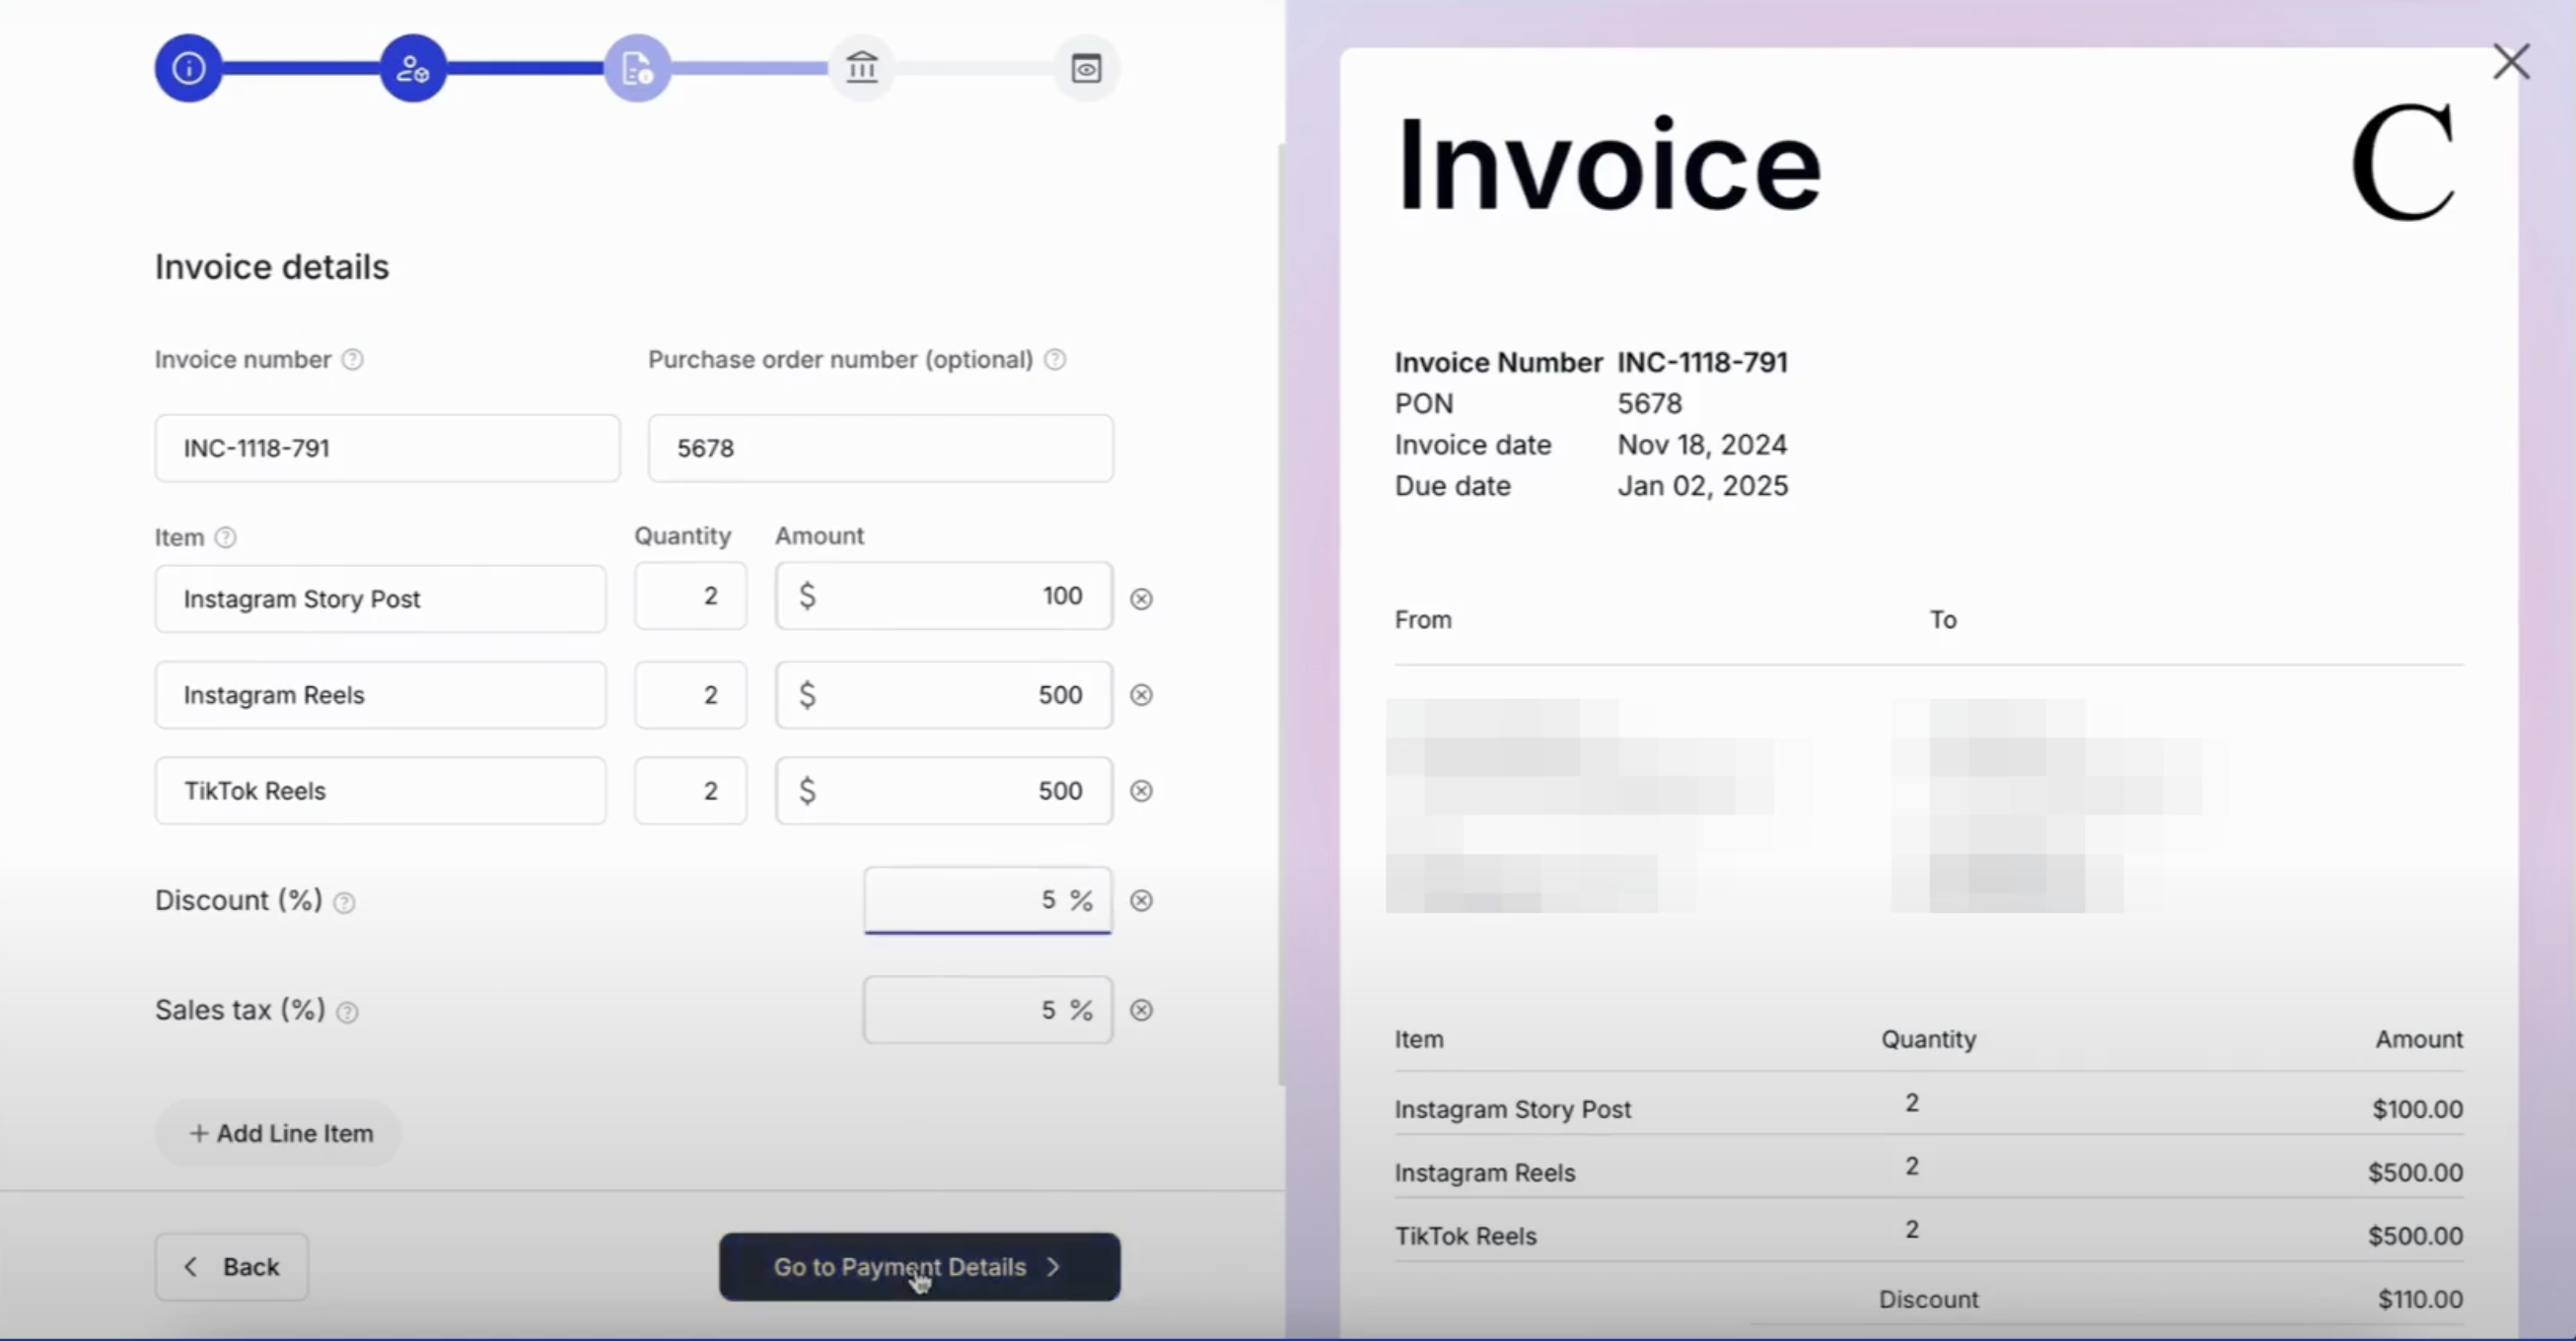
Step 5: Enter Invoice Details
Next, click on the "Enter Invoice Details" button to provide specific invoice-related information:
- Invoice number (if applicable)
- Itemized list of products or services with descriptions, quantities, and prices
- Tax and discount details (if any)
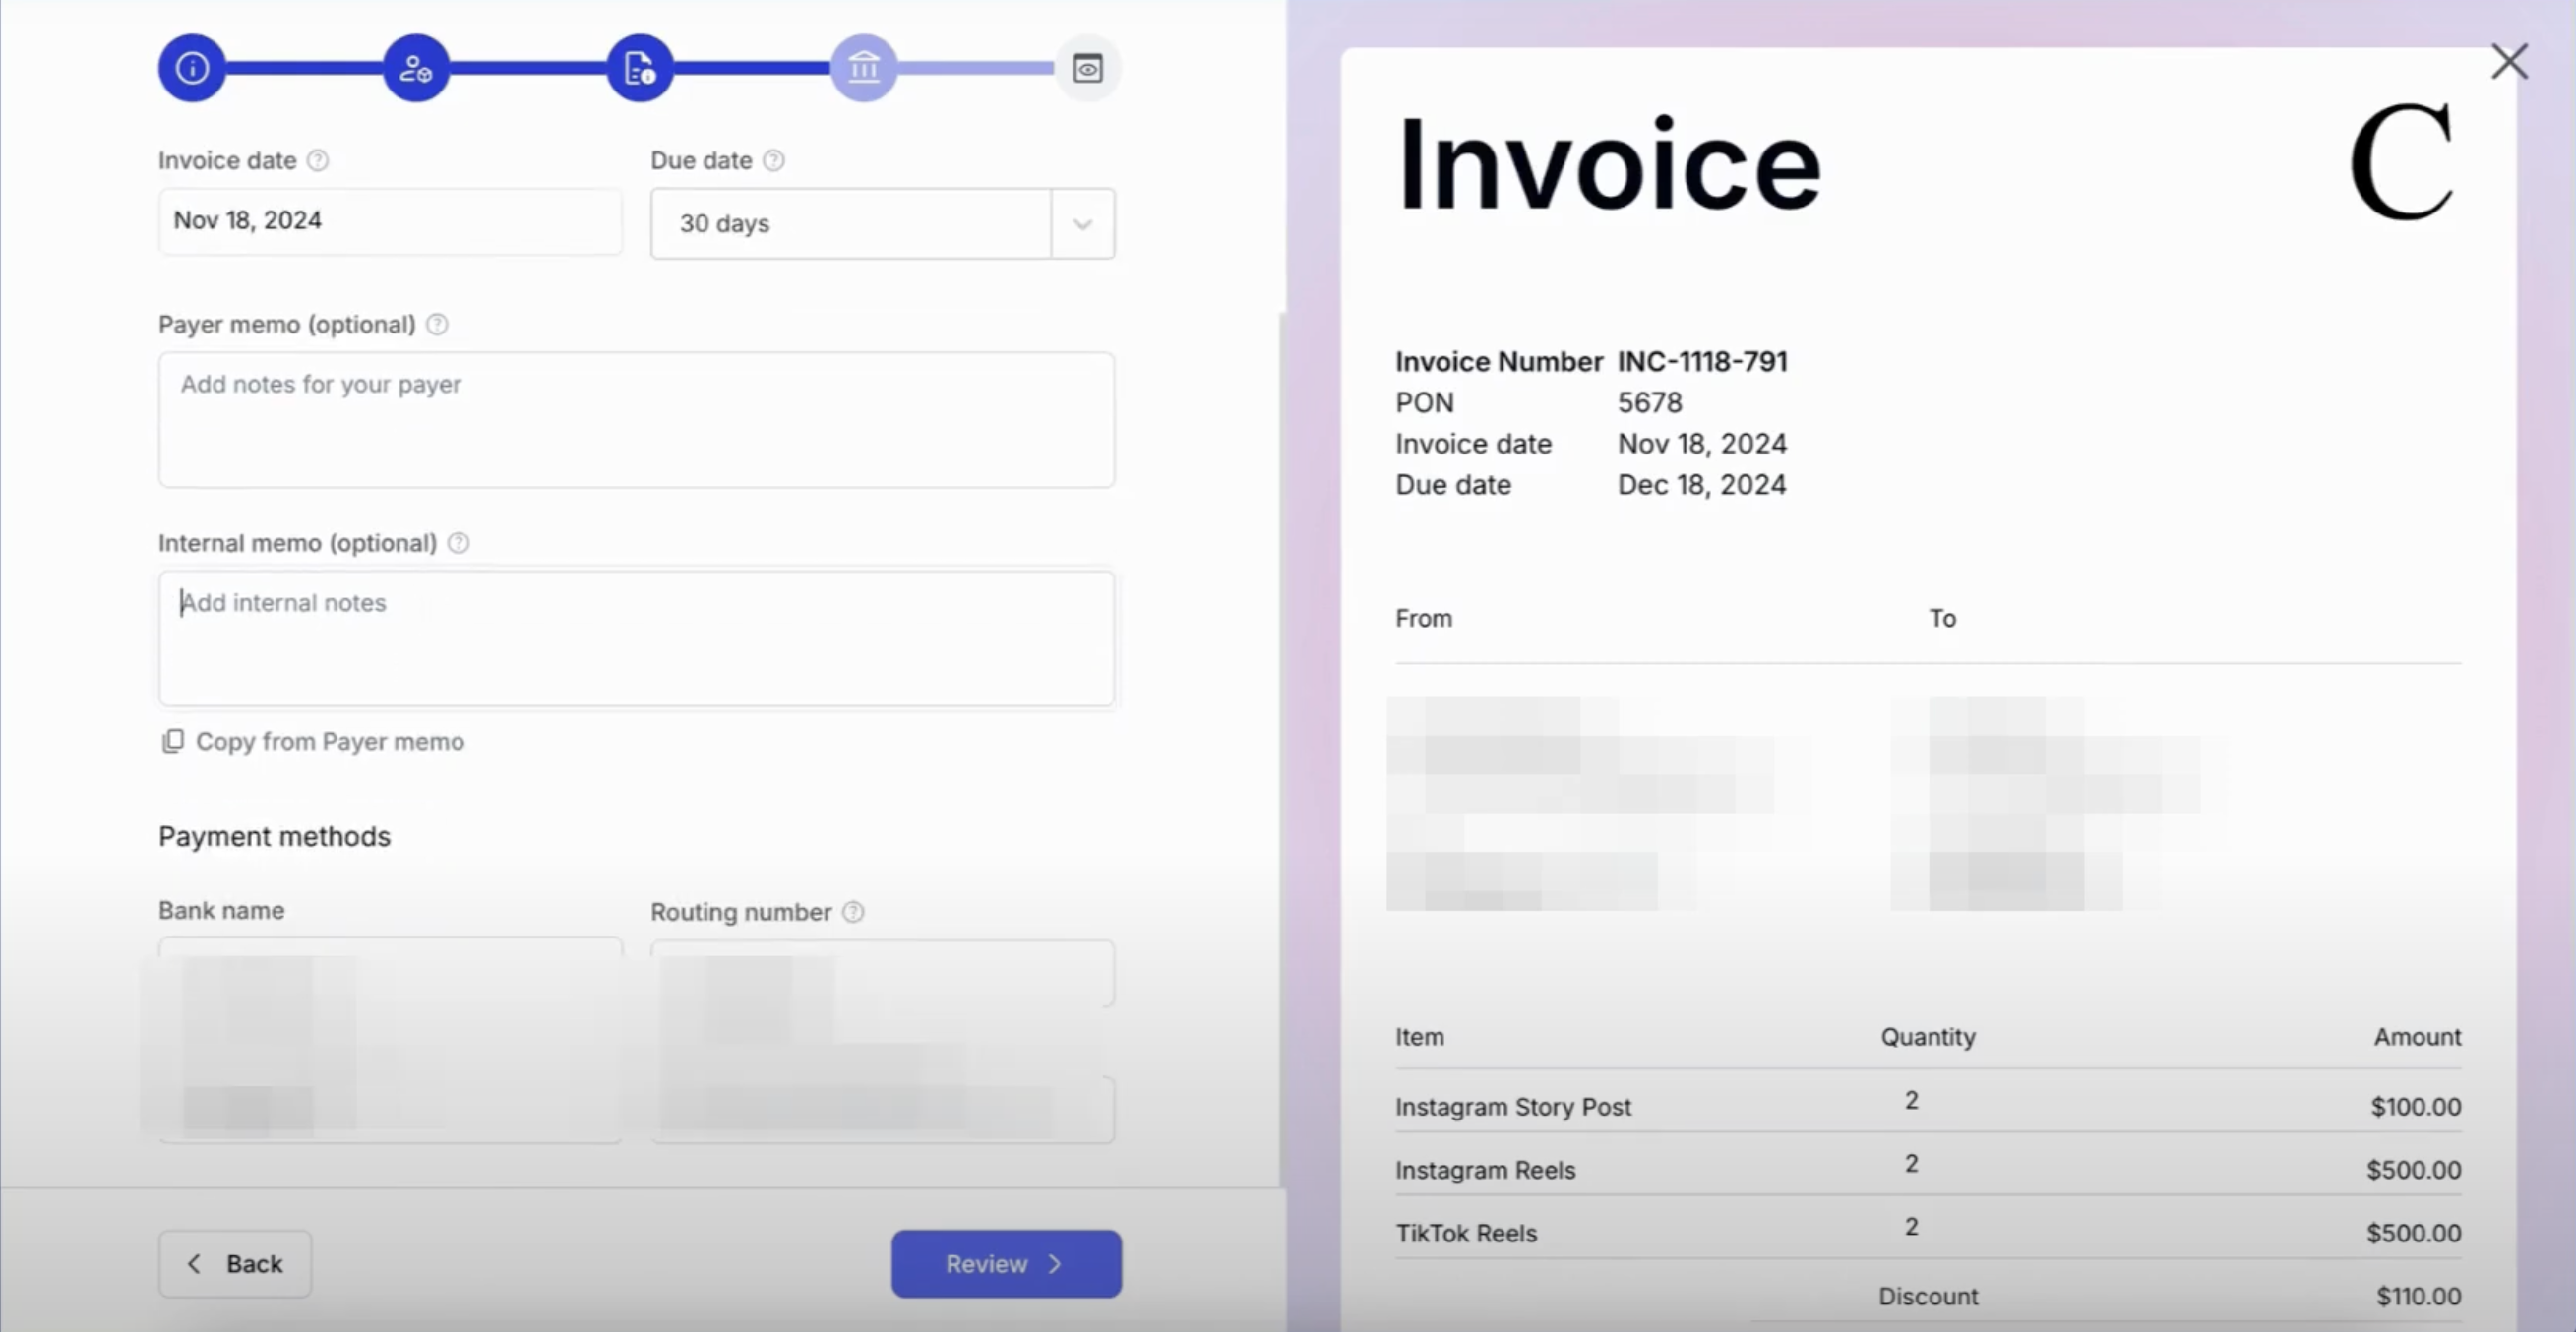
Step 6: Enter Payment Details
Click on the "Enter Payment Details" button and add the necessary payment information, such as:
- Date of issue
- Due date
- Payment method
- Account details for payment processing
- Additional payment instructions
Step 7: Review the Invoice
Before generating the final invoice, click the "Review" button to check all the details. Make sure the following are accurate:
- Business and recipient details
- Item descriptions and pricing
- Payment terms and tax calculations
Step 8: Edit, Download, or Share Your Invoice
After reviewing, you have multiple options:
- Click the "Update to Edit" button if you need to make changes.
- Download the invoice as a PDF for your records.
- Share the invoice URL with your client.
- Select the "Update and Send Email" button to send the invoice directly to the recipient’s email.
Conclusion
Otto provides a seamless invoicing experience, making it easy for businesses and freelancers to create an invoice quickly. By following these steps, you can efficiently generate, edit, and send invoices with just a few clicks. Start using Otto today and simplify your invoicing process!
FAQs
1. Is Otto free to use?
Otto offers both free and paid plans. The free plan includes basic invoicing features, while premium plans provide additional customization and automation options.
2. Can I edit an invoice after sending it?
Yes, you can edit an invoice after sending it by selecting the "Update to Edit" button. However, it's recommended to inform the recipient about any changes.
3. How can I resend an invoice?
Yes you can resend an invoice, you can go to your invoice dashboard, select the invoice, and use the “Resend Email” option.
4. Can I track the status of my invoice?
Yes, Otto allows you to track invoice status, including when it has been viewed, paid, or remains pending.
5. How can I send an invoice via email?
After creating an invoice, select the "Update and Send Email" button to send it directly to the recipient's email address.